Crafting your own beauty products offers a unique level of control over what you apply to your face, especially when it comes to the delicate skin near your eyes. Learning how to make mascara at home is a rewarding project that allows you to bypass synthetic preservatives, parabens, and fragrances often found in commercial brands.
By selecting your own ingredients, you ensure that the formula is tailored to your sensitivities while achieving the desired aesthetic effect on your lashes. Whether you are driven by a desire for a more organic beauty routine or simply enjoy the creativity of DIY projects, this process is surprisingly straightforward.
Understanding the Core Components of DIY Mascara
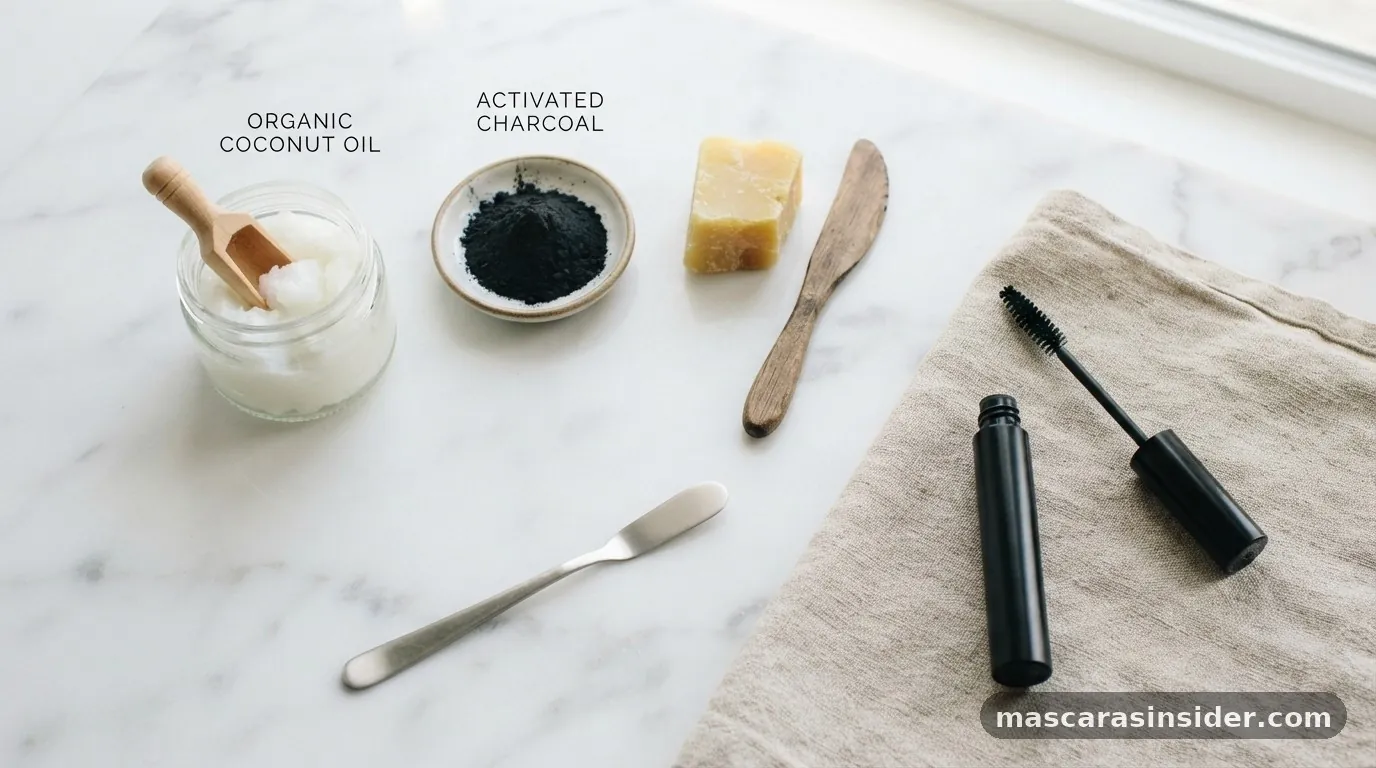
To make mascara at home effectively, you must understand the role each component plays in the final consistency and performance. A functional mascara needs a pigment, a binding agent, and a moisturizing or thickening base. Pigmentation is usually provided by activated charcoal or food-grade cocoa powder, depending on the intensity of the black or brown hue you prefer.
The binding agent, often beeswax or a plant-based wax alternative, ensures that the product adheres to your lashes without flaking off throughout the day. Meanwhile, oils like coconut oil or emollients like aloe vera provide the necessary slip and hydration, preventing the formula from becoming too brittle or dry.
When you start experimenting with these recipes, you will find that the ratio of wax to oil is the most critical factor. Too much oil, and your mascara will smudge easily; too much wax, and it will be impossible to apply smoothly. Many enthusiasts find that using a high-quality, organic beeswax provides the best structural integrity, while a small amount of shea butter can add a luxurious, creamy texture.
Because you are applying this product directly near eyes, it is vital to source high-quality, food-grade ingredients. Impure charcoal or low-grade oils can lead to irritation, which is the exact opposite of what you want when creating your own clean beauty products.
Essential Ingredients and Equipment for Your Recipe
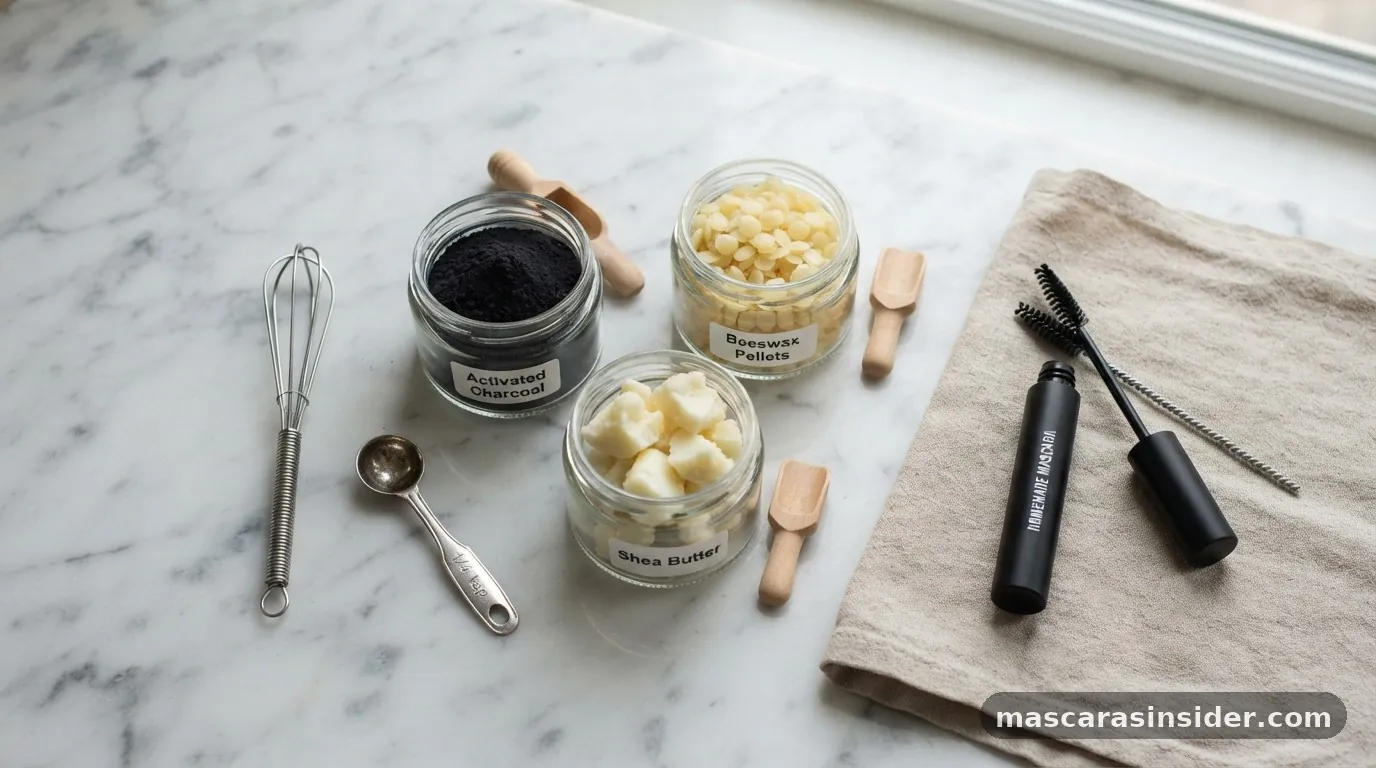
Before you begin mixing, you need to gather specific supplies to ensure the process remains sanitary and effective. You will need a clean, sanitized mascara tube—which can be purchased empty online or recycled from a thoroughly cleaned old wand—along with a small mixing bowl, a whisk or a tiny spatula, and a piping bag or a plastic storage bag to help transfer the mixture. The ingredients themselves should be measured with precision, usually using a standard 1/4 tsp or 1/2 tsp measuring spoon, to keep the consistency uniform across different batches.
- Activated charcoal: Provides the deep black pigment for a classic look.
- Beeswax pellets: Acts as the primary binder to keep the mascara on your lashes.
- Coconut oil: Adds moisture and helps the mascara glide on smoothly.
- Aloe vera gel: Often used for a lighter, more natural-feeling formula that conditions lashes.
- Vitamin E oil: A natural preservative that helps extend the shelf life of your homemade product.
- Bentonite clay: Sometimes added to improve the thickness and longevity of the wear.
It is important to remember that because you are not using professional-grade chemical preservatives, your homemade mascara will have a much shorter shelf life than store-bought versions. Most DIY enthusiasts recommend making small batches that you can use up within two to four weeks.
Always prioritize cleanliness by sterilizing your tools with rubbing alcohol before you start, as the eye area is highly susceptible to bacterial infections. Keeping your workspace clean is just as important as the quality of the ingredients themselves.
Step-by-Step Instructions to Make Your Own Formula
When you are ready to prepare your mixture, follow a methodical approach to ensure the ingredients emulsify correctly. Start by melting your solid fats and waxes in a double boiler. This prevents the delicate oils from overheating or burning, which would change their chemical properties and scent.
Once the beeswax and coconut oil have fully melted into a clear liquid, remove them from the heat. Carefully whisk in your pigment—the activated charcoal—until the mixture is completely smooth and free of lumps. If you notice small specks of powder, keep whisking; the consistency should be uniform to ensure an even application on your lashes.
Once the pigment is incorporated, allow the mixture to cool slightly but not to the point where it hardens completely. If you are adding aloe vera or essential oils, do so at this stage. If the mixture is too hot, it can cause the aloe to separate or lose its efficacy.
After the ingredients are combined, use a plastic bag with the corner snipped off to pipe the liquid into your empty mascara tube. Tap the tube firmly against a hard surface to remove any air bubbles, which can cause the wand to pull out too much product at once. Let the mascara set at room temperature for several hours before you first use it, allowing the oils and waxes to bond into a stable, usable paste.
Comparing Different Base Ingredients
The choice of base ingredients significantly impacts the final performance, look, and feel of your natural mascara. Depending on your skin type and personal preferences, you may find that one combination works better than another. Below is a comparison of common base ingredients used in DIY recipes to help you choose the right path for your specific needs.
| Ingredient | Benefit | Best For |
|---|---|---|
| Beeswax | Superior hold and water resistance | Long-lasting wear and volume |
| Coconut Oil | Excellent slip and lash conditioning | Dry or brittle lashes |
| Aloe Vera Gel | Lightweight and non-irritating | Sensitive eyes and natural finish |
| Shea Butter | Creamy texture and deep hydration | Thickening and softening lashes |
As indicated in the table, your choice of binder determines how the product wears. If you want a mascara that stays put during a long day, beeswax is your best friend. If you have extremely sensitive skin or suffer from allergies to bee products, you might prefer a formula based on aloe vera and vegetable glycerin, though keep in mind this version will be much less water-resistant.
You can also explore the FDA guidelines on cosmetic safety to understand the importance of ingredient purity when formulating products for use in the eye area. Always research your ingredients before you start to ensure they are safe for topical application.
Addressing Common Challenges and Topical Gaps
Many people who try to make mascara at home encounter the same hurdles: clumping, smudging, or a formula that dries out too quickly. One common gap in information for beginners is how to troubleshoot the texture. If your mascara is clumping on the wand, it likely contains too much pigment relative to the oil content.
You can fix this by adding a tiny drop of almond or jojoba oil to thin the mixture. If it is smudging under your eyes, the wax content might be too low. In this case, try adding a few more pellets of beeswax to increase the melting point and stability of the product.
Another frequently overlooked aspect is the wand itself. The wand often dictates the look more than the formula. If you have an old, high-quality wand from a favorite commercial brand, wash it thoroughly with warm, soapy water and let it dry completely before using it with your new DIY mascara.
The shape of the bristles—whether they are dense, sparse, curved, or straight—changes how the product is deposited. A dense, synthetic brush is great for volume, while a thin, plastic comb-style wand is better for separation and length. Don’t be afraid to reuse different wands to see which one provides the best application for your specific lash type.
Maintaining Hygiene and Safety Standards
Because you are working with products that will be applied to the sensitive skin near eyes, maintaining rigorous hygiene is non-negotiable. Homemade products lack the robust preservative systems found in mass-market cosmetics, which means they are more prone to bacterial and fungal growth. To minimize these risks, never “pump” your wand in and out of the tube, as this pushes air and bacteria into the container.
Instead, use a gentle twisting motion to coat the wand. If you notice any change in smell, texture, or color, discard the product immediately.
Furthermore, it is advisable to keep your mascara in a cool, dark place. Heat and sunlight can cause the natural oils to go rancid, which not only ruins the product but can also cause irritation. If you find yourself experiencing redness, itching, or swelling, stop using the product right away.
It is also good practice to sanitize your mascara tube every time you finish a batch. Even though the tube is small, it can harbor bacteria if not cleaned properly. Using a small brush to scrub the inside of the tube with soap and warm water, followed by a rinse with high-percentage isopropyl alcohol, will help keep your tools safe for repeated use.
Frequently Asked Questions
Can I make mascara without using charcoal?
Yes, you can use other natural pigments like food-grade cocoa powder for a softer brown look or even black mineral oxides. If you choose to use mineral pigments, ensure they are specifically labeled as safe for use around the eyes to avoid potential contamination or skin irritation.
How long does homemade mascara usually last?
Without commercial-grade preservatives, homemade mascara typically lasts about two to four weeks. It is best to make small batches that you can finish quickly. If the mascara starts to smell off or the texture changes, it is time to throw it away and make a fresh batch.
Is it safe to put these ingredients on my eyes?
When using high-quality, food-grade ingredients, DIY mascara is generally safe. However, always perform a patch test on your inner arm first to check for allergic reactions. If you have pre-existing eye conditions or extreme sensitivities, consult with a dermatologist or eye care professional before trying new products.
How do I remove homemade mascara?
Most natural oil-based mascaras are easily removed with a gentle oil-based cleanser or even a small amount of jojoba or coconut oil on a cotton pad. Because these formulas are often more natural, they usually dissolve quickly without the need for harsh scrubbing or tugging at your lashes.