Achieving a wide-eyed, bright look often comes down to the subtle geometry of your lashes. If you have ever wondered, do you use eyelash curler before or after mascara, you are certainly not alone. This is one of the most debated topics in the beauty community.
While some swear by the post-mascara crimp for maximum drama, the vast majority of professional makeup artists and dermatologists advise against it. Understanding the mechanics of your eyelash curler is the key to maintaining lash health while achieving that coveted, fluttery aesthetic.
When you apply heat or pressure to your eyelashes, you are essentially reshaping the hair shaft. Doing this while the hair is coated in a drying, setting agent like mascara changes the physics of the curl. To get the best results without risking breakage, you need to understand the sequence of operations that keeps your eyes looking open and fresh throughout the day.
Why You Should Always Curl Before Applying Mascara
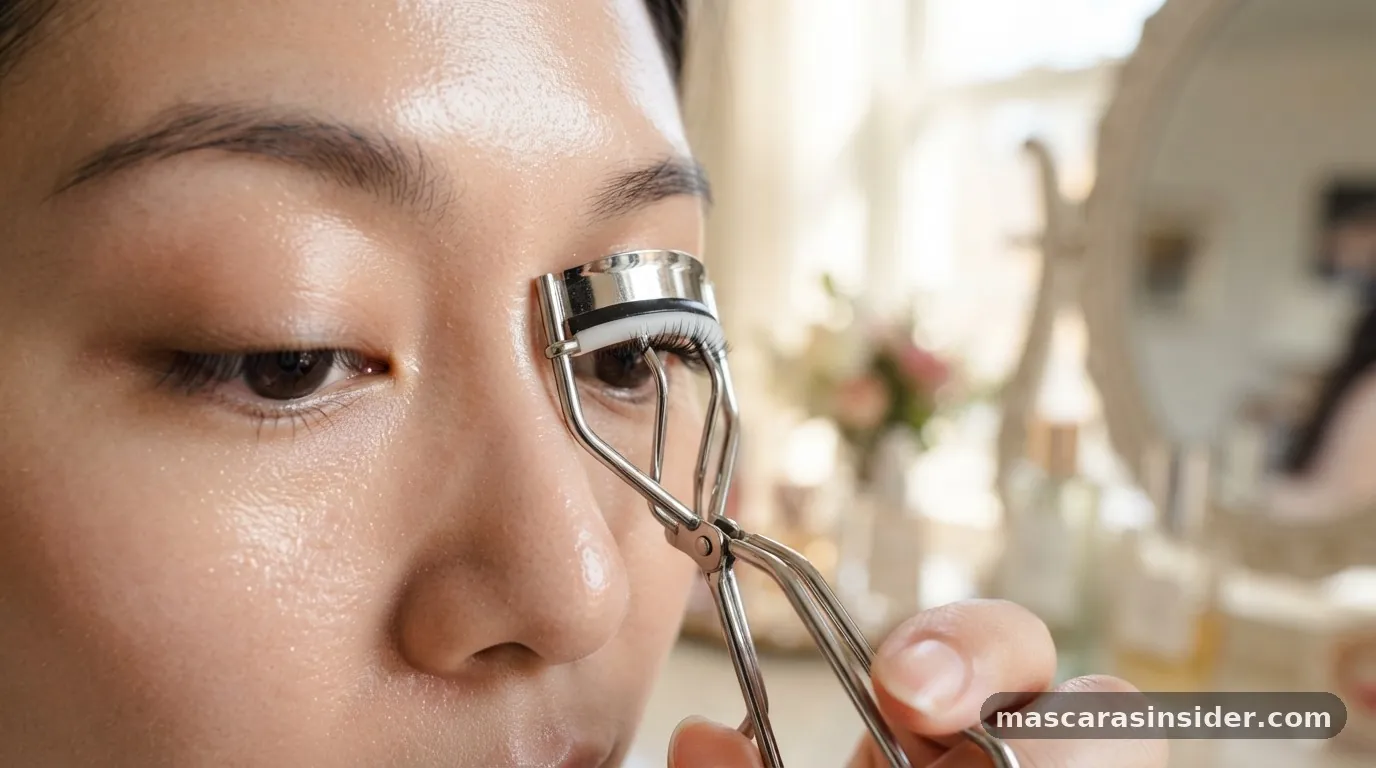
The short answer is that you should use an eyelash curler on clean, bare lashes before you start applying mascara. Curling your lashes while they are dry ensures that the metal or plastic pads of the tool grip the hair shaft directly. When the lashes are bare, they are flexible and ready to take on a new shape.
Once you apply a coat of mascara, the formula dries and hardens. This creates a rigid structure that, if forced into a bend by a mechanical tool, is prone to snapping or becoming brittle.
Think of your lashes like hair on your head. You wouldn’t use a curling iron on hair that is already stiff with a heavy-duty, fast-drying hairspray. The heat would cause the hair to fry or break because the product acts as a barrier and a stressor.
The same logic applies to your eyes. By curling first, you create the desired lift and curvature, and then the mascara acts as a “setting spray” to lock that shape in place for the rest of the day.
Furthermore, using a lash curler on mascara-coated lashes is a recipe for a sticky mess. The mascara will inevitably transfer onto the rubber pads of the curler.
Once that residue builds up, it attracts dirt and bacteria, which can lead to eye infections or sties. If you must curl after, you are essentially dragging a sticky, tacky substance through a mechanical device that is meant to slide against smooth, clean hair.
The Risks of Curling After Mascara Application
Curling your lashes after you have already applied product is high-risk behavior for your delicate eye area. When you clamp down on mascara-coated lashes, the product often sticks to the rubber pad of the tool.
As you pull the curler away, you risk pulling out your natural lashes along with the clumped mascara. This is a common cause of premature lash loss and can lead to sparse areas that take weeks or months to grow back.
Another major issue is the potential for breakage. Mascara is designed to coat, thicken, and lengthen. Many formulas contain polymers that stiffen the lash to keep it held upward.
When you introduce a mechanical crimp to a stiffened hair, it often creates a harsh, unnatural crease rather than a soft, sweeping curl. This sharp angle can weaken the structural integrity of the individual hair, eventually causing it to snap off mid-length.
If you are concerned about maintaining a natural look, avoid the “L-shaped” lash. This happens when you apply too much pressure on already-coated lashes.
It creates a jagged bend that looks artificial and can make your eyes appear smaller rather than more open. To protect your lashes, always prioritize the health of the follicle by keeping the curling process mechanical and dry, leaving the coating process for the very end of your routine.
Step-by-Step Guide to Perfect Lash Curling
To achieve the best results, consistency is vital. Follow these steps to ensure you are curling lashes safely and effectively:
1. Start with completely clean, dry eyes. Any residual oils or leftover makeup can cause the curler to slip, leading to uneven results or tugging.
2.
Position the eyelash curler at the base of your upper lashes. Ensure all lashes are inside the frame without pinching your eyelid skin.
3. Gently squeeze the handle.
Hold the pressure for five to ten seconds. Avoid pumping the curler repeatedly, as this can create a crimp instead of a curve.
4. Move the curler slightly toward the middle of the lash length and give a very light, quick squeeze.
This creates a softer, more rounded effect.
5. Release the curler carefully.
Make sure the device is fully open before you pull it away from your eyes to avoid pulling out any stray hairs.
6. Apply your favorite mascara, starting at the root and wiggling the wand upward to coat the base heavily and the tips lightly.
By following this sequence, you ensure that the lift comes from the structural bend you created, while the mascara provides the pigment and volume to highlight that shape. This method is the industry standard for a reason. It balances aesthetic appeal with the long-term health of your natural eyelashes.
How to Maintain Your Tools for Better Results
A well-maintained tool is just as important as the technique itself. If your eyelash curlers have worn-out pads, you are essentially using a metal blade against your lashes. Over time, the rubber pads can develop grooves or lose their elasticity.
If you notice a crack in the rubber or if the pad has become flattened, it is time to replace it. Most high-quality brands sell replacement pads, but if the frame itself is bent or the hinge is stiff, it is better to invest in a new tool.
Keeping your tools clean is non-negotiable. Even if you only use them on bare lashes, natural oils from your skin can accumulate on the pads.
Use a mild soap or a specialized makeup brush cleanser to wipe down the rubber pads once a week. This prevents buildup that can make the curler stick to your lashes during use.
Consider the design of the curler as well. Different face shapes require different curvatures.
If you find that your curler misses the inner or outer corners of your eyes, you may need a tool with a different arc. A curler that fits your eye shape comfortably will do a better job of grabbing every lash, which means you won‘t feel the need to “fix” your work after applying mascara.
Comparing Methods: Before vs. After
When you evaluate the two approaches, the differences in outcome are significant. The table below outlines the primary considerations for each method.
| Factor | Curling Before Mascara | Curling After Mascara |
|---|---|---|
| Lash Health | Safe; minimal breakage risk | High risk of snapping and pulling |
| Curl Longevity | Lasts all day with proper formula | Risk of dropping due to product weight |
| Tool Hygiene | Keeps pads clean and fresh | Pads become sticky and harbor bacteria |
| Visual Finish | Smooth, natural, upward sweep | Often creates sharp, unnatural creases |
As demonstrated, the benefits of curling before you apply your makeup far outweigh the perceived benefits of post-mascara curling. While some might argue that curling after gives a “boost,” the damage to the hair cuticle and the loss of lashes are simply not worth the marginal difference in lift. If you feel like your curl isn’t holding, the solution is usually to switch to a waterproof or “hold” formula mascara rather than changing the order of your makeup application.
Addressing Topical Gaps: Why Some People Still Curl After
There is a persistent myth that curling after mascara provides a superior “lift.” This often stems from people using low-quality curlers that don‘t effectively catch the lashes, or using a mascara formula that is too heavy and causes the lashes to droop immediately after application. When the lashes droop, the user feels the need to go back in with the curler to “re-bend” them.
If you find yourself in this cycle, look at the ingredients in your mascara. Formulas that are heavy in oils or waxes can weigh down a curl.
If you want to keep that look throughout the day, try a tubing mascara or a waterproof formula. These are generally lighter and set more firmly, which helps maintain the shape created by the curler.
Additionally, some people use heated eyelash curlers. These are designed to use gentle heat to set the curl. Even with a heated device, the rule remains the same: use it on clean, dry lashes.
The heat acts to soften the hair follicle so it can be molded into a curve, similar to how a curling iron works on the hair on your head. Applying heat to mascara-coated lashes is even more dangerous, as the heat can melt the waxes in the mascara, causing it to smudge or clump, and potentially burning the lashes themselves. For more information on eye safety, you can refer to the American Academy of Ophthalmology guidelines on cosmetic safety.
FAQ: Common Concerns About Curling Your Lashes
Does curling my lashes cause them to fall out?
It shouldn’t if done correctly. If you are losing lashes, you are likely pulling too hard, using a dirty curler, or curling after mascara application. Always ensure your hand is steady and you are curling bare lashes to prevent unnecessary friction and tension.
How often should I replace the rubber pads on my curler?
You should replace the rubber pad every three months, or sooner if you notice the rubber is cracking, thinning, or losing its springiness. Using an old, flat pad is one of the fastest ways to accidentally crimp or break your natural lashes.
Can I use a hair dryer to heat my lash curler?
While some people do this, it is not recommended. It is very easy to overheat the metal, which can cause serious burns to your eyelid skin. If you want a heated effect, use a tool specifically designed for that purpose with temperature control.
What if my lashes won’t hold a curl?
If your lashes are naturally straight or stubborn, focus on your mascara choice. A waterproof formula is often better at holding a curl because it doesn’t contain water, which can soften the lash and cause it to straighten out. Alternatively, consider a professional lash lift for a semi-permanent solution.
The key to mastering your eye makeup is understanding that your tools are designed to work in a specific sequence. By treating your lashes with the same care you would treat your hair, you ensure they stay strong, healthy, and perfectly curled. Remember, the goal of an eyelash curler is to enhance your natural beauty, not to force your lashes into a shape that damages them.
Stick to the pre-mascara routine, keep your tools clean, and you will see a noticeable improvement in the quality and longevity of your lash look. Consistent, gentle application will always help you achieve that wide-eyed appearance without the risk of breakage or irritation. Focus on the process, respect the delicate nature of your eyelashes, and you will won the battle against stubborn, straight lashes every single time.