Achieving a wide-awake, bright-eyed look often comes down to the subtle geometry of your eyelashes. If you have ever stared at your mirror, tool in hand, wondering do i curl my lashes before or after mascara, you are certainly not alone. This is one of the most debated topics in beauty routines, and the answer is rooted in both physics and the structural integrity of your hair.
To put it simply: you should almost always curl your lashes before applying any product. Applying a mechanical tool to coated hairs is a recipe for breakage and mess.
When you use an eyelash curler on clean, bare lashes, you are working with a flexible, natural surface. Once you apply mascara, the formula hardens around the hair, creating a rigid structure. If you attempt to bend that hardened structure, it will likely crack or clump.
By prioritizing the curl as a preparatory step, you ensure your eye makeup looks polished and professional without damaging your delicate lashes. Let’s explore why this sequence is the gold standard for your daily makeup routine.
The Physics of Curling Before Mascara
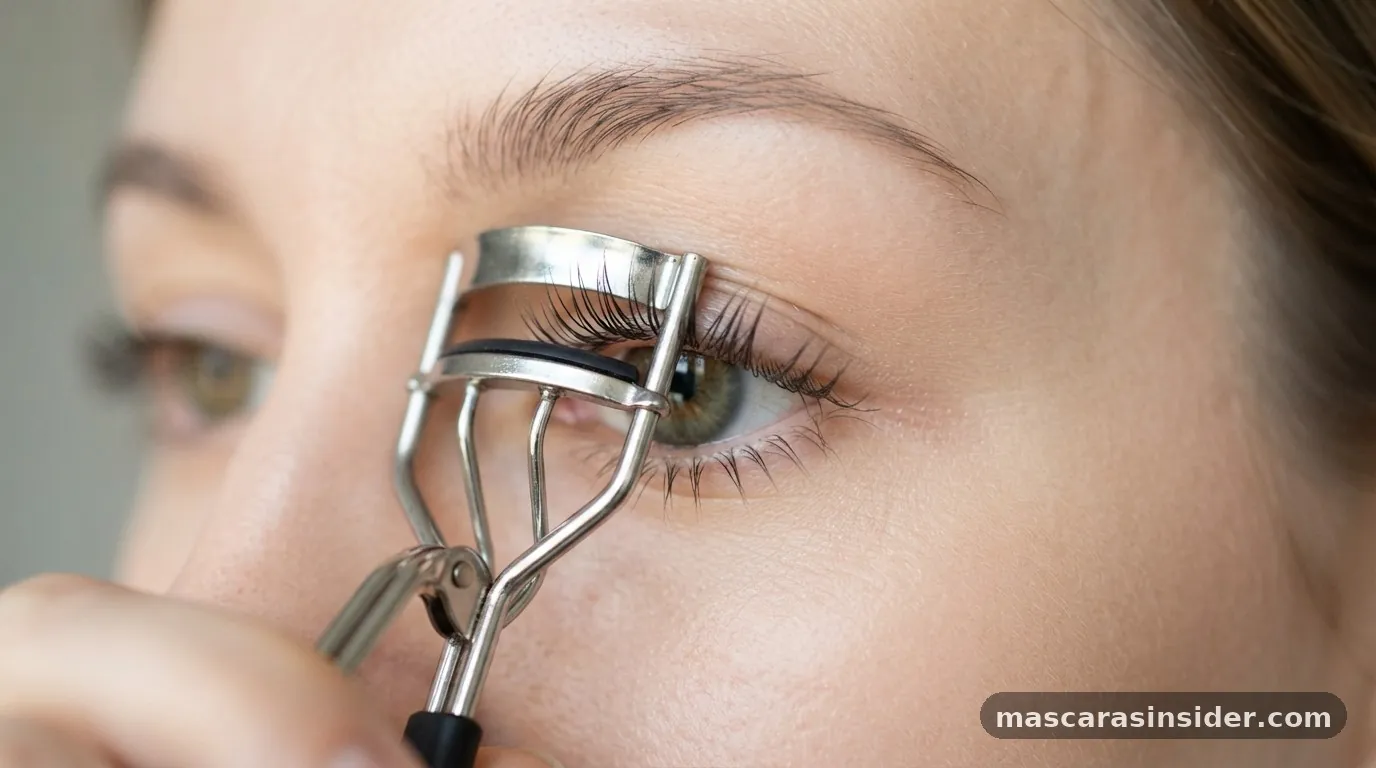
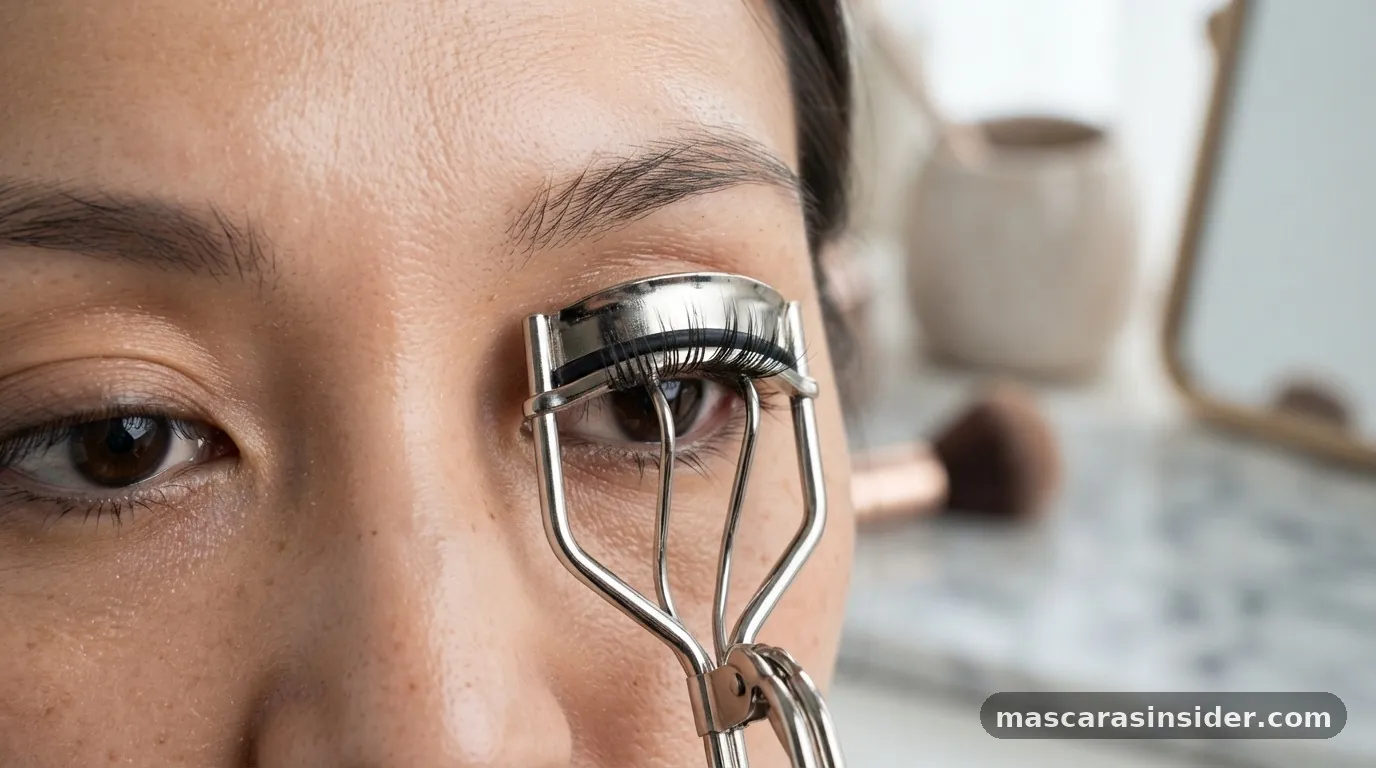
The most effective way to achieve a long-lasting lift is to curl your lashes while they are completely clean and dry. When your lashes are bare, the curler can grip the hair directly against the lash line, providing a firm, consistent bend that mimics the natural arc of the eye.
Because the hair is flexible, the tool can impart a shape that holds throughout the day. Mascara acts as a setting agent; once the product dries, it locks that shape in place.
If you reverse this order, you are essentially trying to re-shape a stiff, coated filament. Mascara is designed to add weight and volume, which is exactly the opposite of what you want when you are trying to create a lift. Adding weight to a curled lash makes it prone to drooping, but adding weight to a lash that you are attempting to curl often leads to uneven results.
You might find that the curler pulls the product off your lashes, leaving behind a gummy mess on the rubber pads of the device. This not only ruins your look but also makes your tools difficult to sanitize.
1. Start by ensuring your lashes are free of any leftover residue from the previous day.
2. Position the curler as close to the root as possible without pinching the skin.
3.
Gently squeeze and hold for five to ten seconds, focusing on the base of the lashes.
4. Release the tension slowly before moving the tool away from your eye.
5. Apply your preferred mascara to lock the lift in place.
Why Curling After Mascara Causes Damage
Many people who ask do i curl my lashes before or after mascara are tempted by the idea that a second curl will “boost” the look later in the day. However, using an eyelash curler on top of dried product is one of the fastest ways to cause eyelashes to break or fall out.
Mascara formulas contain waxes and polymers that harden as they set. When you clamp down with metal or plastic pads, you are applying pressure to a brittle surface.
Instead of a gentle, sweeping curl, you risk creating a sharp, unnatural crimp in the middle of the lash. Even worse, the sticky nature of the mascara can cause the hairs to adhere to the rubber pads of the curler. When you pull the curler away, you may accidentally tug on the lashes, causing them to detach from the follicle prematurely.
Over time, this mechanical trauma weakens the lash line, leading to sparse or patchy growth. Protecting the health of your lashes is just as important as the aesthetic result. If you find your curl falling flat, it is usually better to choose a better-formulated mascara rather than risking your lash health with a post-application curl.
Choosing the Right Tools for Your Eye Shape
Not every lash curler is created equal. The curvature of the metal frame should ideally match the curvature of your eye.
If you have deep-set eyes, you might need a curler with a shallower arc, while those with almond-shaped eyes might benefit from a wider, more dramatic curve. Using a tool that doesn’t fit your eye shape can lead to uneven curling, where the inner or outer corners of your lashes remain flat while the center is over-processed.
When shopping for this essential makeup tool, look for one with high-quality silicone pads. These pads act as a cushion between your delicate lashes and the cold, hard metal of the frame. Over time, these pads will harden and crack, which can actually cut your lashes.
Experts recommend replacing your silicone pads every three months or whenever you notice signs of wear. Keeping the tool clean is also vital; a buildup of old product can prevent the pads from gripping the hair effectively, forcing you to squeeze harder, which increases the risk of breakage.
| Factor | Curling Before Mascara | Curling After Mascara |
|---|---|---|
| Lash Health | Safe and gentle | High risk of breakage |
| Curl Longevity | Better, set by formula | Poor, prone to drooping |
| Tool Maintenance | Clean and efficient | Messy, causes product buildup |
| Natural Look | Uniform, soft arc | Sharp, uneven crimps |
Techniques for a Long-Lasting Lift
If you struggle to keep your lashes curled throughout the day, the issue might not be the order of operations, but your technique. Many people only curl the base of their lashes, which can result in a “staircase” effect rather than a smooth, open-eyed look. To get a more natural, fanned-out appearance, try a “pulse and move” technique.
Start at the base, as mentioned, but then move the curler slightly upward toward the middle of the lashes and give it another gentle squeeze. This creates a more gradual, sweeping curve that lasts much longer. Additionally, consider the type of mascara you are using.
Waterproof formulas are generally superior for holding a curl because they are designed to repel moisture, which can otherwise weigh down the lash and cause it to lose its shape. You can find more detailed advice on lash care through the American Academy of Ophthalmology website, which provides reliable information on eye health and safety.
* Always ensure your lashes are completely dry before you start.
* Avoid pulling or tugging on the eyelid while using the tool.
* Consider using a heated lash curler if your hair is particularly stubborn or straight.
* Work in small sections to ensure every lash is caught in the curve.
* Apply your mascara immediately after curling to “set” the shape.
Addressing the Topical Gaps: Can You Ever Curl After?
There is a common misconception that curling after mascara is a “pro” trick for extra drama. While some makeup artists might do this on a photoshoot set, they are using very specific, non-setting mascaras or are extremely careful to avoid the risks mentioned earlier.
For the average person in a daily routine, this is not a recommended practice. If you feel that your lashes look flat even after curling, the problem is likely your mascara formula.
Some formulas are simply too heavy. If you have thin, straight lashes, a volumizing mascara might be too much, causing the lashes to droop immediately upon application. Instead, opt for a lengthening or “tubing” mascara.
Tubing mascaras are lightweight and resistant to smudging, making them ideal for maintaining a lift. Another potential gap is the “straight lash” struggle.
If your lashes are naturally very resistant to curling, you might be using an eyelash curler that is too old or has a worn-out pad. Sometimes, simply heating your metal curler with a hairdryer for a few seconds (test it on your hand first to ensure it isn’t too hot!) can help create a more dramatic, lasting bend.
Common Mistakes That Ruin Your Lash Look
The most frequent error people make is rushing the process. When you are in a hurry, it is easy to clamp the curler down and pull away too quickly, which results in a sharp, unnatural angle. This creates a “broken” look rather than a soft, fluttery lash.
Another mistake is forgetting to clean the curler. Old makeup buildup is sticky and can pull on your lashes, while also harbor bacteria that can lead to eye infections.
You should also be wary of the pressure you apply. You do not need to squeeze with all your might. A firm, consistent pressure is enough to bend the hair.
If you find yourself needing to squeeze harder and harder, it is a sign that your curler’s padding needs to be replaced. Remember, your eyelashes are hair; just like the hair on your head, they can become brittle and damaged if treated roughly. By being gentle and consistent, you can achieve a beautiful, wide-eyed look every single day without sacrificing the health of your eyes.
Frequently Asked Questions
Is it ever okay to curl my lashes after applying mascara?
It is generally not recommended. Curling after mascara risks breaking your lashes because the product makes them brittle and stiff. Furthermore, the mascara can stick to the curler’s pads, pulling out lashes and creating an uneven, clumpy, or crimped appearance that is difficult to fix once set.
How often should I replace my eyelash curler pads?
You should replace your silicone pads every three months. Over time, the silicone becomes hard, cracked, or dirty, which can cause the tool to cut or tear your lashes. If you notice the pad has a deep groove or is losing its elasticity, replace it immediately to ensure safety.
Will heating my eyelash curler help?
Yes, using a blow dryer to warm the metal of your curler for a few seconds can help the curl hold better, similar to using a curling iron on hair. Always test the temperature on your hand first to ensure it is warm, not hot, to avoid burning your eyelid.
Why do my lashes lose their curl within an hour?
This usually happens because the mascara formula is too heavy or contains oils that weigh the lash down. Try switching to a waterproof formula, which is lighter and designed to lock in shape, or ensure you are curling as close to the root as possible without touching the skin.