This is one of those beauty questions that sparks genuine debate at every makeup counter. You’ve got the curler in one hand, the mascara wand in the other, and you’re staring at yourself wondering which comes first.
It matters more than you’d think. Get the order wrong and you can flatten your lashes, tug out a few, or ruin an otherwise clean eye look.
The short version? Curl before.
Almost every makeup artist, dermatologist, and lash expert agrees on this. But the reasons behind it are worth understanding, because knowing why helps you fix your own results when they go sideways.
The Straight Answer: Curl Before Mascara
You should curl your lashes before applying mascara. Full stop. The logic is simple once you see it in action.
Mascara coats your lashes in a wet, slightly sticky formula that dries to a firm finish. When you clamp a metal eyelash curler down on lashes that already have product on them, a few bad things happen. The mascara can transfer onto the curler pad.
Your lashes can stick to that pad. And when you pull the curler away, dried mascara becomes brittle, so the lashes snap or get yanked out at the root.
Curling on clean, dry lashes avoids all of that. The natural lash bends smoothly into shape, and you get a clean lift with no clumping or breakage.
As the American Academy of Dermatology points out in its eye-area care guidance, being gentle around the lash line protects both the lashes and the delicate skin around your eyes. Curling first is part of being gentle.
Why the Order Actually Changes Your Results
Think about the physics for a second. A clean lash is flexible. It responds to the gentle pressure and heat of your hands, holding the new shape the curler gives it.
Add mascara and the whole game changes. Once the formula dries, your lashes are rigid. Trying to bend a stiff lash is like trying to fold a dry twig, it resists, then cracks.
Here’s what tends to go wrong when people curl after applying mascara:
- Lashes stick to the rubber pad and rip out when you release the curler
- Dried mascara flakes off, leaving gaps in your coverage and specks under your eyes
- The curl looks harsh or kinked instead of a smooth, natural lift
- Your curler gets gunked up with product, which then transfers to your next application
- Over time, repeated tugging causes real lash damage and thinning
Curling clean lashes first gives you a soft, lifted base. Then mascara sets that shape and holds it through the day.
The Right Way to Curl Your Lashes, Step by Step
Curling looks easy, but small mistakes cost you. A rushed clamp near the root can pinch skin.
Curling too far out toward the tips gives you a weak, uneven curl. Here’s a method that works.
Get set up first
Make sure your lashes are completely clean and dry. No leftover mascara, no oily makeup remover residue, nothing. If you cleansed your eye area recently, give it a minute to fully dry so the lashes aren’t limp.
Position the curler at the base
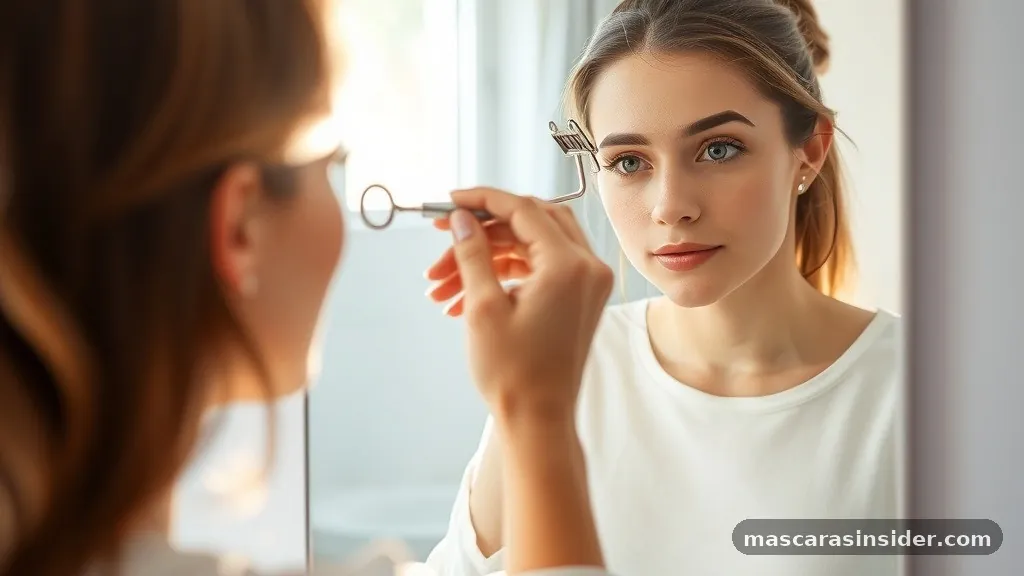
Open your eye and bring the eyelash curler close to the lash line. Position it right at the base, as close to the root as you comfortably can without catching your eyelid skin. Look down slightly to get a clear view.
Clamp and hold
Squeeze gently and hold for about 10 to 15 seconds. Don’t crush. Firm but relaxed pressure is enough to shape the lash without crimping it.
Work along the length
For a rounded, natural look instead of a sharp bend, release, move the curler a little further up the lash, and repeat. Two or three gentle clamps along the length give a smoother curve than one hard pinch at the base.
Then, and only then, reach for the mascara.
Curl Before vs Curl After: A Quick Comparison
If you’re still tempted to flip the order, this table lays out what each approach actually gives you.
| Factor | Curling Before Mascara | Curling After Mascara |
|---|---|---|
| Lash health | Protects lashes, minimal breakage | High risk of pulling and snapping |
| Curl quality | Smooth, natural lift | Harsh kinks, uneven shape |
| Curler cleanliness | Stays clean and dry | Coated in sticky mascara |
| Coverage | Even, no flaking | Cracked, patchy coverage |
| Long-lasting curl | Yes, mascara sets the shape | Often collapses or looks broken |
The pattern is obvious. Curling before mascara wins on every count that matters.
How to Make Your Curl Last All Day
Getting a curl is one thing. Keeping it is another, especially if you’ve got stubborn, straight, or heavy lashes that want to droop by lunchtime. A few tricks help the lift hold.
Warm the curler slightly. Run a hair dryer over the metal for a couple of seconds, then test it on the back of your hand before it touches your eye.
Warm metal shapes lashes the way a warm barrel shapes hair. Never let it get hot enough to burn, this is a warm-to-the-touch situation, not a hot one.
Choose a mascara that supports curl. Some formulas are heavy and weigh lashes down. Lightweight, lengthening or “curling” mascaras help hold the shape rather than dragging it back down.
Apply mascara right after curling, while the lift is fresh. Wiggle the wand at the base and sweep upward, following the direction of the curl. That upward motion reinforces the shape.
A few more things that help:
- Keep your curler clean, wipe the pad regularly so old residue doesn’t build up
- Replace the rubber pad when it cracks or hardens, a worn pad can crimp lashes
- Avoid oily products near the lash line before curling, oil makes lashes slip and the curl won’t take
- Don’t over-pump the wand, which adds air and dries out your mascara faster
Your lashes may just be very
If your curl still falls flat, your lashes may just be very straight, and that’s fine. A heated eyelash curler, which holds a low, steady temperature, tends to give a more durable lift for difficult lashes.
Common Mistakes That Wreck Your Lashes
Even people who curl in the right order sometimes sabotage themselves. Watch for these.
Curling over mascara out of habit. Some folks do a quick curl, apply mascara, notice a droop, then curl again to “fix” it. That second curl is the one that pulls lashes out. If you need to re-lift, do it gently and accept a slightly less perfect result rather than tugging.
Using a dirty curler. Old mascara and bacteria collect on the pad. That’s both a hygiene issue for your eyes and a reason curls come out patchy. Wipe the pad down with a bit of makeup remover on a cotton pad, then let it dry before you use it.
Pinching the eyelid. Rushing the position means catching skin in the clamp. It hurts, and it can leave a mark. Slow down, get the angle right, clamp only the lashes.
Skipping the curl entirely on some days but not others. Consistency helps your lashes hold shape over time. That said, you don’t need to curl every single day, and giving your lashes a break now and then reduces cumulative stress.
As celebrity makeup artist Bobbi Brown
As celebrity makeup artist Bobbi Brown has long taught her teams, curled lashes open up the eye more than almost any other single step, but only when done with a light hand.
What About Lash Serums, Extensions, and Falsies?
The curl-before rule is for natural lashes with regular mascara. Other situations change the advice.
If you wear lash extensions, skip the curler completely. Metal curlers can snap the extension bonds and pull out your natural lashes underneath. Extensions are usually pre-curled anyway, so you don’t need it.
With strip false lashes, curl your natural lashes before applying the strip so the two blend. Don’t clamp down on the falsies themselves with a metal curler once they’re on.
Using a lash growth serum? Curling is still fine, just be gentle, since longer lashes can feel more fragile as they grow in.
Frequently Asked Questions
Does curling lashes before mascara actually damage them?
Curling clean, dry lashes before mascara is the safest approach and causes minimal damage when done gently. The real damage comes from curling after mascara, when dried product makes lashes brittle and prone to snapping. Use a light touch, hold for a few seconds, and replace your curler pad when it wears out.
Can you curl your lashes without a curler?
Yes, though results are subtler. Warming a clean spoon and pressing lashes against it, or simply pushing lashes upward with a fingertip while applying a curling mascara, gives a small lift. A dedicated eyelash curler still works best for a defined, long-lasting curl.
How long should you hold the eyelash curler?
About 10 to 15 seconds is enough. Longer than that doesn’t improve the curl and risks pinching. For a rounded shape, do a few shorter clamps along the length of the lash instead of one long squeeze at the base.
Why won’t my lashes hold a curl?
Usually it’s one of three things: naturally straight lashes, oily residue on the lashes before curling, or a heavy mascara dragging them down. Curl on clean dry lashes, try warming the curler slightly, and switch to a lighter, curl-friendly formula.
Should I curl again if my lashes droop during the day?
You can, but do it carefully and only if the mascara isn’t fully wet. Curling over dried mascara raises the risk of breakage, so use gentle pressure and don’t force it. Warming the curler first helps re-set the shape with less tugging.
The Bottom Line
Curl first, then mascara. That order protects your lashes, gives you a smoother lift, keeps your curler clean, and helps the shape hold through the day. Doing it the other way round is how you end up with brittle, snapped, or yanked-out lashes and a curl that looks kinked instead of natural.
Keep your curler clean, position it at the base, hold for a few seconds, and follow up with a light upward coat of mascara while the lift is fresh. Warm the metal slightly if your lashes are stubborn, and skip the curler altogether if you wear extensions. Get the sequence right and the rest falls into place, an open, lifted eye that lasts far longer than a rushed, out-of-order routine ever could.