Nothing ruins a good makeup day faster than looking in the mirror and spotting those little spider legs on your lashes. You know the ones. Thick, sticky clusters where three or four lashes have glued themselves together into a clump.
It happens to almost everyone, and honestly, it’s usually not your lashes’ fault at all. It’s technique, product, and a couple of small habits that are easy to fix once you know what’s going wrong.
The good news? Clump-free lashes aren’t reserved for makeup artists with fancy kits.
With the right wand movement, a decent formula, and a bit of patience, you can get separated, fluttery lashes at home. Let’s walk through exactly how to do it.
Why Does Mascara Clump in the First Place?
Before you fix the problem, it helps to understand what’s actually causing it. Clumping is almost always a sign that there’s too much product landing on your lashes at once, or that the formula has gotten thick and gloopy.
The most common culprit is overloaded wand. When you dip the brush in and pull it straight out, a blob of product collects on the bristles. That excess has to go somewhere, and it ends up dumped onto your lashes in a big wet coat that dries into a clump.
Old mascara is another big one. Most formulas are designed to be used for about three months after opening.
After that, the liquid starts to dry out and thicken inside the tube, which makes it nearly impossible to apply evenly. The American Academy of Ophthalmology actually recommends tossing eye makeup like mascara every two to three months, partly for hygiene and partly because old cosmetics can irritate your eyes and harbor bacteria.
Here are the usual reasons lashes clump:
- Too much product on the wand from pumping the brush
- Dried-out or expired formula that’s gone thick
- Applying a second or third coat before the first one dries
- A brush that’s too dense or holds too much product
- Not wiping the wand before application
- Layering mascara over lashes that already had product on them the day before
Once you spot which of these is your issue, the fix usually becomes obvious.
The Right Way to Prep Your Lashes
Clump-free application starts before the wand ever touches your lashes. Prep matters more than people give it credit for.
Start with clean, dry lashes. If there’s leftover mascara from yesterday, that old dried product acts like glue and grabs onto the fresh coat. Take it all off with a gentle remover and let your lashes dry completely.
Curling comes next, if you curl at all. Always curl before mascara, never after.
A curler pressing against wet or dry mascara will crack the coat and can even yank lashes out. Clamp gently at the root, hold for a few seconds, then walk the curler up toward the tip in a couple of small steps to create a natural bend.
Some people like to dust a tiny bit of translucent powder over bare lashes with a spoolie or clean brush. This old-school trick adds grip and volume, giving the mascara something to hold onto so it builds thickness without gooping up. It’s optional, but it works.
If you don’t own a curler, don’t stress. You can still get lifted lashes by holding the wand at the root for a second and pressing upward as you apply. A warm spoon pressed gently against the lash line for a few seconds can mimic a curler in a pinch too, which is where that “mascara with a spoon” trick comes from.
How to Apply Mascara Without Clumping, Step by Step
This is the part that really matters. The way you handle the wand determines whether you end up with defined lashes or a clumpy mess. Here’s the method that works.
Step 1: Wipe the wand first
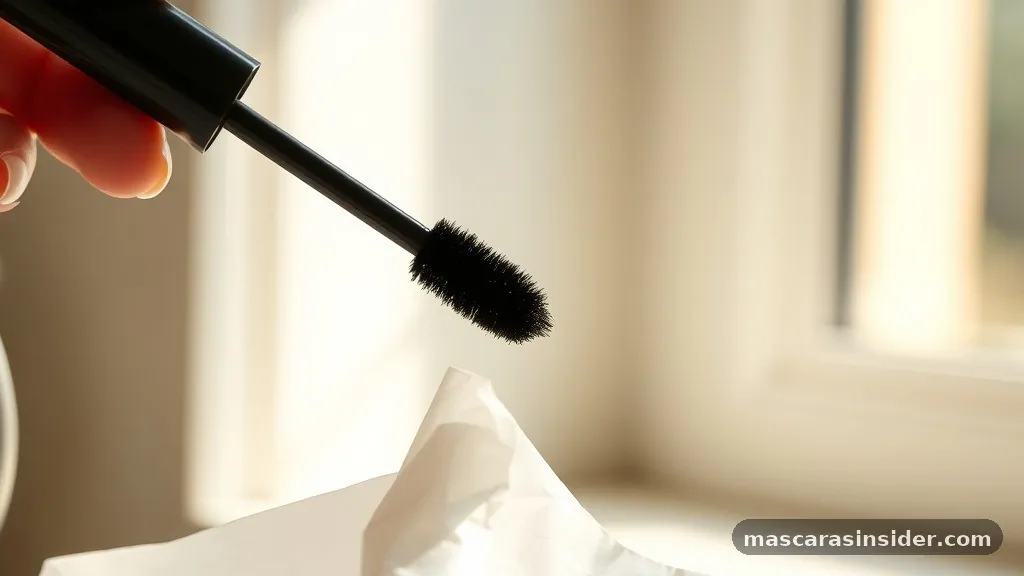
After you pull the brush out of the tube, gently wipe one side against the rim or a tissue. This removes that extra blob of product that causes clumps. You want an evenly coated brush, not a dripping one.
Step 2: Don’t pump the wand
Pumping the brush in and out forces air into the tube, which dries the formula out faster and loads too much product onto the bristles. Instead, twist the wand slowly as you remove it. If you need more product, dip once, gently.
Step 3: Start at the root and wiggle
Place the wand at the base of your upper lashes and wiggle it side to side as you sweep upward. That little zigzag motion at the root deposits color where it matters and helps separate each lash as you pull through to the tip. Wiggling is the single biggest trick for even application.
Step 4: Work in thin coats
One thin coat, then let it dry for maybe fifteen to twenty seconds before you add another. Building slowly is how you get volume without clumping. Two thin coats beat one heavy coat every single time.
Step 5: Comb through if needed
If a clump sneaks through, don’t panic. Use a clean spoolie or an old washed mascara wand to comb through and separate the lashes while the product is still slightly wet. This step alone can rescue an otherwise clumpy application.
Choosing the Right Mascara and Brush
The formula and brush shape make a real difference, and the wrong combination can sabotage even perfect technique.
Brush shape controls a lot. A skinny, tapered brush gives you precision and separation, which is ideal if clumping is your main worry.
Big, fluffy brushes pack on volume but tend to deposit more product, so they clump more easily. Silicone or plastic bristle wands with well-spaced teeth are great for keeping lashes separated because they comb as they coat.
Formula matters too. Lengthening formulas are usually drier and lighter, so they clump less than heavy volumizing ones. Waterproof mascaras dry fast, which can help prevent clumping but can also make lashes stiff if you overapply.
Here’s a quick comparison to help you match your goal to the right product:
| Mascara Type | Best For | Clumping Risk |
|---|---|---|
| Lengthening (thin brush) | Natural, separated look | Low |
| Volumizing (fluffy brush) | Dramatic, full lashes | Higher |
| Silicone/plastic wand | Separation and definition | Very low |
| Waterproof | Long-wear, humidity | Medium |
| Tubing formula | Easy removal, clean finish | Low |
If your favorite mascara clumps no matter what, the tube itself might be the problem. Mascara clumping in the bottle usually means it’s dried out. A trick some people swear by is dropping two or three drops of saline solution into the tube to loosen a thick formula, though this only extends its life a little and won’t revive truly expired product.
Bottom Lashes and Other Tricky Spots
Upper lashes get all the attention, but the bottom row is where clumps love to hide. They’re shorter and finer, so they hold product differently.
For bottom lashes, hold the wand vertically and use just the tip. This gives you way more control and stops you from smearing a thick coat all over.
Lightly touch each lash rather than sweeping across all of them. Because there’s so little surface area down there, even a tiny bit of excess looks like a clump.
Some people skip bottom lashes entirely for a cleaner, more open-eyed effect. That’s a totally valid choice, especially for a natural daytime look.
The inner and outer corners of your upper lashes need attention too. Those tiny corner lashes clump easily because they’re short and crowded. Use the very tip of the wand and a gentle touch to define them without overloading.
One more tip for the whole eye area: if you get mascara on your lid or under your eye, don’t wipe it while wet. Let it dry completely, then flick it away with a clean spoolie or cotton swab. Smearing wet mascara just spreads the mess.
Habits That Keep Lashes Clump-Free Long Term
Getting one clean application is nice, but building a few small habits keeps your lashes looking good every day.
Replace your mascara on schedule. Three months is the sweet spot.
Write the open date on the tube with a marker if you tend to forget. A fresh formula is easier to apply than any technique trick can compensate for.
Store it properly. Keep the tube closed tight and away from heat, which dries it out faster. Don’t leave it sitting in a hot car or by a sunny window.
Clean your tools. If you use a spoolie to comb your lashes, wash it now and then. A crusty brush transfers dried product right back onto your lashes.
As celebrity makeup artist Bobbi Brown has often noted, less product applied well always looks better than more product applied poorly. That principle holds true for mascara more than almost anything else in your bag.
Quick daily reminders
Quick daily reminders:
- Wipe the wand before every use
- Apply in thin, buildable coats
- Comb through with a spoolie while slightly wet
- Curl before, never after
- Toss and replace every three months
Frequently Asked Questions
Why are my eyelashes clumping even with new mascara?
If a brand-new tube is clumping, the issue is almost always technique. You’re probably loading too much product on the wand or applying a second coat before the first dries.
Wipe the brush before each pass, use thin coats, and comb through with a clean spoolie. The brush shape could also be too dense for your lashes.
What can I put in mascara to make it less clumpy?
A couple of drops of sterile saline solution can loosen a formula that’s started to thicken in the tube. Don’t use water, which can introduce bacteria and dilute the product unevenly.
This is only a temporary fix. If the mascara is more than three months old, it’s better to just replace it.
What is the correct way to apply mascara?
Start at the root of your upper lashes and wiggle the wand side to side as you sweep up toward the tips. This separates lashes and deposits color evenly.
Apply one thin coat, let it dry briefly, then add a second coat if you want more volume. Finish by combing through any clumps.
Can I apply mascara without an eyelash curler?
Absolutely. Press the wand upward at the root and hold for a second as you apply to lift the lashes.
A warm clean spoon held gently against the lash line for a few seconds can also mimic a curler. Lengthening formulas naturally give the appearance of more open, lifted eyes too.
How many coats of mascara should I use?
Two thin coats is the sweet spot for most people. It gives you noticeable volume and length without the buildup that leads to clumping.
A third coat rarely adds much and usually just makes lashes stiff and heavy. If you want more drama, reach for a volumizing formula rather than piling on extra layers.
Final Thoughts
Clump-free lashes come down to three things: a fresh formula, a wiped wand, and thin coats you build up slowly. Wiggle at the root, comb through anything that clumps, and never rush a second layer onto a wet first one. That’s really the whole secret.
The technique feels fiddly at first, but it becomes automatic fast. Give yourself a week of practicing the wiggle-and-comb method and you’ll wonder how you ever ended up with spider legs. Fresh mascara, gentle hands, and a little patience will get you separated, fluttery lashes that actually look like your own, just better.